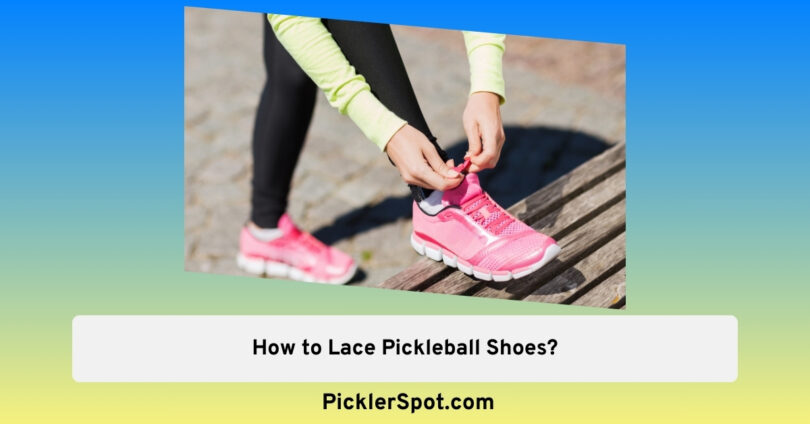
The right pair of kicks can send you sprinting after every shot. However, unlaced shoes could only send you tripping over your own feet.
In a pickleball court, well-laced shoes are known to be the epitome of discipline and a competitive spirit and without it, you will feel like all over the place, or dare I say, all over the court.
To play pickleball the right way, you need to understand the core ideologies which state that you need to be a thorough gentleman from your warm-up to the final handshake all while having a proper dress code, and that includes laced-up shoes because being a tripping hazard automatically constitutes a pickleball “faux pas” and the easiest way to become the court comedian which is the last thing you would rather want.
In that case, being an avid Pickleball player, I have curated this guide on How to Lace Pickleball Shoes, so you can focus on your game, not your feet.
Why Lacing Even Matters in Pickleball?
You might be wondering, how lacing your shoes properly or the right way makes a whole difference because it goes beyond just preventing tripping hazards, here is why,
1. Comfort Factor
If your shoes are too loose or untied, your feet will shift excessively with every step, impacting your balance and potentially leading to discomfort, moreover, it also leads to blisters which might distract you from your game while you are playing the game.
Even if the shoes have all the padding you might need in the world, if the placement isn’t right, you will never benefit from it. In other words, an untied or improperly laced shoe could be the direct culprit behind a lost game.
It plays a psychological barrier to playing your best because it goes without saying that when your mind is on your feet instead of the ball, you’re missing out on the fun and competitive spirit of pickleball.
2. Loss of Stability
Pickleball is all about achieving stability since you are most likely partaking in movement in a lateral direction which means if your shoes are untied or improperly laced, they won’t provide the ankle support needed for those sudden stops and pivots.
Moreover, you would also put unnecessary strain on your joints. Over time, this can lead to pain and potential overuse injuries.
The fact that you have to constantly readjust every now and then might feel like a nightmare, especially in the middle of a heated rally as those interruptions can ruin your rhythm and momentum ruining your potential altogether.
Your body language is the key to playing with a sense of control and confidence. When you trust your feet, your shots become more powerful and precise.
This aspect regarding untied shoes might feel trivial and even cumbersome to deal with, but a great player would always know that even the smallest details, like well-laced shoes, can make a big difference.
3. Feet Support
If you really want to feel like Bruce Lee of Pickleball and less of a comedian who doesn’t have time to tie up their shoelaces, then it’s in your best interest that you get familiar with those bunny ears and loopholes.
In Pickleball, it is also highly necessary that your arches and ankles are secure and protected, so you can move with speed and agility.
A well-laced shoe ensures that your foot stays firmly planted within the shoe, preventing slippage and potential injury. It also plays a huge role in minimizing fatigue and discomfort, allowing you to play your best for longer.
Check Also: 7 Pickleball Shoes for Plantar Fasciitis
Pickleball Shoe Lacing Methodologies
Here are a variety of ways you could tie those pesky laces up, so you can dive into action,
1. Footlocker Lacing
Starting with the most basic one, in this lacing methodology, your heel is well secured since you can attain all the support needed, it is quite similar to the heel locking technique, however, in this technique all you have to do is simply lace the shoe to the second to last eyelet, then threading the lace through the opposite side’s loop before tying off.
If you are looking for a snug fit and want your heel to be secured at all times so you can aggressively play on the court, then this lacing method is highly feasible for your needs. It also helps in reducing ankle pain due to wear and tear when it isn’t usually secured in its place.
2. Double Back Lacing
Next in the line is the double back lacing, the type of technique that feels like a brute since it provides plenty of support due to its methodology of letting the lace go through the eyelets twice, creating a reinforced and extra-secure fit which means it provides ultimate stability and control.
This sort of technique is extremely ideal for those with wider feet or who need maximum ankle support. If you want to replicate it, you can. start by lacing your shoes normally up to the desired point.
Then, instead of crossing over, take each lace and thread it back down through the eyelet directly below, creating a double layer.
3. Criss-Cross Lacing
This is by far one of the most common forms of shoe lacing and you would see it being utilized in most sports, a criss-cross lacing is reliable and easier to replicate because it provides even pressure distribution across the entire foot and not just one spot or region.
To replicate it, you can start by threading your laces through the bottom eyelets from the outside in. Then, take one lace and cross it diagonally upward, threading it through the next eyelet on the opposite side. Repeat this process with the other lace, alternating sides until you reach the top.
4. Straight Bar Lacing
In contrast, straight bar lacing is the most underrated technique in the bunch and mostly overlooked, nevertheless, it’s extremely easy to replicate as all you have to do is thread the laces straight up the eyelets, one on each side, without any crisscrossing.
This method offers a more relaxed fit and might be suitable for people with high arches or those who prefer a looser feel.
Although it might not provide the same level of support as other techniques, the silver lining here is that it offers a clean and minimalist look, the sort of vibes that you would want to show off those bold new shoes without a complicated lacing pattern distracting the eye.
5. Window Lacing
As the name suggests, window lacing is a sophisticated “looking” lacing technique that is used to provide support for feet that have higher arches as it creates small gaps or “windows” between the laces, relieving pressure on sensitive areas and promoting better circulation.
Since it emphasizes providing comfort and boosting circulation for your foot all while reducing wear and tear, the window lacing technique is extremely handy in hotter or humid regions.
To utilize it, you can start off by lacing your shoes criss cross style until you reach the area where your arch feels pressure. Then, skip an eyelet on both sides and thread the laces directly across, creating a “window”. Continue your criss-cross pattern above the window as needed, it is just that easy.
6. Toe Reliever Lacing
The toe reliever lacing might be my first bit from the bunch because I always love a bit of extra wiggle room for my toes. So if you are like me and hate that feeling of those being squished at the front of the shoe then start off by threading your laces through the bottom eyelets from the outside in.
Instead of crossing them over, take each lace and thread it straight up the next eyelet on the same side.
Continue this pattern for the next one or two eyelets, and then resume your regular lacing for the rest of the shoe, you cannot go wrong with it, and the feeling of walking or strolling around is beyond priceless, I can assure you.
7. Heel Lock Lacing
A Lacing technique designed for kings and no less, the Heel lock lacing lets you bring maximum stability to your heel, preventing slippage and giving you a powerful, confident stride which in my opinion is quite essential for all those quick pivots and lateral movements of pickleball.
To get your heel fixated, you can start by lacing your shoes with your preferred method that is mentioned above which could be either criss-cross, straight bar, etc. Nevertheless, the goal is to have the second-to-last eyelet.
Now, Instead of crossing the laces, take each one and thread it through the top eyelet on the same side, creating a loop.
Then, cross the laces over and thread each one through the loop on the opposite side. Pull tight and tie your shoes to lock your heel in place. Just don’t apply too much tension though, you don’t want to congest your blood flow, so moderation is the key!
8. Loop Lacing
Lastly, we have the mighty loop lacing at hand. This one is rather tricky because it requires a bit more attention to detail but offers maximum customization for a personalized fit. Nevertheless, usually used by runners and joggers but that doesn’t mean you cannot use it in a pickleball court.
The benefit of loop lacing is that you can create targeted zones of tightness and looseness, giving you complete control over your shoe’s feel.
For instance, if you have a blister on one spot or by any misfortune have your foot injured on a specific spot, you can adjust the lacing to provide relief without sacrificing support in other areas.
In order to replicate loop lacing, you’ll need a shoe with an extra set of eyelets at the top. Start by bringing each lace up through the top eyelet on the same side, creating a sort of webbed structure but not too tight as you need the laces to move easily.
Next, cross the laces over and thread each one through the loop on the opposite side. Finally, pull tight and tie securely.
Final Word
As you can see, knowing How to Lace Pickleball Shoes (the professional way) might sound easier than it looks but once you get familiar with the techniques mentioned above, it will become your second nature and pretty much a pre-game ritual.
Moreover, knowing that this is the sort of esoteric knowledge that you will learn elsewhere, I have written this guide in a straightforward fashion, so you can grasp the idea and even spread the word around with your buddies, you never know who might be secretly struggling with untied laces!
So, share the knowledge, tighten those kicks, and get ready to dominate the court together!


